From Seed to Spicy: Create Your Own Hot Pepper Sauce
Special | 45m 6sVideo has Closed Captions
Homesteader Ed Buc details how to grow pepper plants and make delicious hot pepper sauces.
Blackhammer Acres homesteader Ed Buc walks through the steps for growing your own pepper plants from seed, and details different methods for how to transform those peppers into delicious hot pepper sauces.
Problems playing video? | Closed Captioning Feedback
Problems playing video? | Closed Captioning Feedback
University Place is a local public television program presented by PBS Wisconsin
University Place is made possible by the Corporation for Public Broadcasting.
From Seed to Spicy: Create Your Own Hot Pepper Sauce
Special | 45m 6sVideo has Closed Captions
Blackhammer Acres homesteader Ed Buc walks through the steps for growing your own pepper plants from seed, and details different methods for how to transform those peppers into delicious hot pepper sauces.
Problems playing video? | Closed Captioning Feedback
Where to Watch University Place
University Place is available to stream on pbs.org and the PBS app.
More from This Collection
Experts share horticultural research and gardening tips for Midwest growers. Discover techniques on topics from vegetables and native plants to beekeeping and sustainable landscaping. These talks help gardeners of all levels create beautiful, productive and ecologically sound spaces at home and in their communities.

Video has Closed Captions
Bruce Spangenberg explains the timing of grass maintenance to keep your lawn looking good. (53m 28s)
Video has Closed Captions
Jamie Viebach offers ideas for a safe and beautiful yard for your animal companions. (51m 48s)
Native Plants for Shady Spaces
Video has Closed Captions
Melissa Apland describes native plants and designs that beautify shady parts of your yard. (56m 3s)
Environmentally Conscious Lighting
Video has Closed Captions
Scott Lind and Samantha Saeger explain how to fight light pollution with smarter lighting. (35m 37s)
Video has Closed Captions
Daryl Beyers offers the best hedgerow plants and designs for humans and animals. (53m 12s)

Video has Closed Captions
Cora Borgens explains why and how to prune woody plants for optimal plant health. (50m 56s)

Video has Closed Captions
Patrick Smith uses principles of improv comedy to create a sustainable garden. (49m 23s)
Indoor Gardening for Food and Fun
Video has Closed Captions
Victor Zaderej offers practical advice on how to easily grow produce indoors. (49m 6s)

Wonderful Wool for Your Plants and Your Planet
Video has Closed Captions
Elaine Becker and Karen Mayhew describe how wool is a healthy soil alternative to peat. (48m 2s)
New and Unique Plant Varieties
Video has Closed Captions
Horticulture specialist Allen Pyle showcases standout plants from 2024 trial gardens. (45m 16s)
Video has Closed Captions
Rachel Belida presents ideas for creating a seven-layer food forest in your yard. (45m 45s)
Video has Closed Captions
Becky Gutzman shows how to safely preserve your summer garden bounty for the rest of the year. (58m 35s)
Providing Support for PBS.org
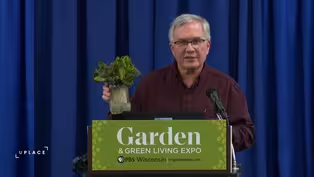
Learn Moreabout PBS online sponsorship[gentle music] - Ed Buc: Good morning, everyone.
This is probably a good presentation to do right before lunch, seeing how it's condiment based.
I'm gonna be talking today about making hot pepper sauce, all the way from the seed-starting process through fermenting and bottling your pepper sauce.
And before I get started, there may be a question you are asking yourselves, and why on earth would you wanna make your own hot sauce?
I see that there's a vendor out here in the expo selling hot sauce.
You go to Pick 'n Save, and there are shelves of hot sauce.
So, why make your own?
And on the garden side, because this is the Garden & Green Living Expo, there's a couple of reasons to do it.
Pun intended, it's a good way to spice up your gardening skills.
So, if you're relatively new to gardening and you've never grown plants from seed before, peppers are a great starting point.
They take a little longer to germinate and grow, but they don't get all spindly like tomato plants do, so they're a great entry point for starting plants from seed.
And if you're an experienced gardener, usually you probably have, like, culled down the varieties you're growing from year to year, but maybe you're looking for an excuse to grow something different.
And maybe you've wanted to try growing hot peppers, but you don't know what you're gonna do with, like, two plants' worth of habanero peppers.
And so, making a hot sauce is a great way to-- for an experienced gardener to maybe try something different.
And then, on the food preservation side, or I guess the green living side of things, the same thing applies.
If you're a relatively new to canning and maybe you've done jams and jellies, hot sauce is a great next step because you can make vinegar-based pepper sauces and you can can them with traditional water bath canning methods.
And likewise, if you are relatively experienced at canning, but maybe you've never done fermentation before, peppers are a great place to start because you can do them relatively small batches.
What I'm gonna show today uses a couple of quart jars or a half-gallon jar, and so it's much more approachable than making a giant batch of sauerkraut, and it only takes a week or two to ferment.
So, and then the last reason is, maybe you'll end up being the person at the expo and you'll stumble across the next sriracha, and you'll be the next sriracha king.
So, why wouldn't you make your own hot pepper sauce?
So, I'm gonna talk today-- I'll start off by telling you a little bit about myself and my background, and then I'll talk about how you can find recipes and how to design your hot sauce.
And then, we'll talk about the planting side of things.
And then, the fermentation and food preservation part of it.
And then, I'll close with some resources, and it was mentioned earlier, hold your questions to the end.
There should be time for questions.
So, who am I?
So, my wife, Maggie, and I have a hobby farm, or we call ourselves homesteaders, out in the Driftless Area in Richland County.
And I'm not a big fan of the word "homesteader," but I'm not a big fan of "hobby farm" either, because to me, that sounds like, you know, very relaxing, and I feel pretty exhausted at the end of every day.
So, it doesn't really feel like much of a hobby to me.
But regardless of what you call it, we try to be as sustainable and as self-sufficient as possible.
And so, to that end, we do, we have a big garden.
We have an orchard, we have a woodlot.
We're getting ready for maple syrup season.
That's coming up soon.
We have chickens and bees and all those sorts of things.
And so, because we grow a lot of our own food, we do a lot of preservation.
And Maggie is really big into fermenting.
I also do fermenting.
I make mead, I make hard cider.
And we stumbled into hot sauce several years ago because we had a bumper crop of peppers.
We had five-gallon pails of peppers, and we had made cowboy candy, and we dehydrated them and we made salsa, and we were running out of things to do.
And so, we decided to try to make hot sauce.
And unbelievably, it worked.
And not only did we end up using a lot of peppers, but it also produced something that we could use in the winter months when we were eating a lot of stews and casseroles.
It was something to jazz up our meals.
And so, since that point, we've been making hot sauce every year, every other year or so.
And so, what I'm gonna talk about today is really making small batches for personal use, but it can be scaled up to market gardeners.
But it's very, very approachable.
And so, the first step you need to really do is come up with a recipe, because what you'll then do is you'll buy pepper seeds to then grow out and make your hot sauce with.
And you know, if there was only a place to go today where you could buy pepper seeds, right?
So, the first step is really to figure out what you wanna grow.
And you can approach this from a number of different angles.
So, you could grow the Scotch bonnet, ghost, scorpion pepper, the hottest pepper you can find and just make your hot sauce out of that.
Do your own home version of Hot Ones.
This is your hot sauce journey, so do whatever you want.
If you wanna make a one-note pepper with the hottest pepper you can find, go for it.
On the other end of the spectrum, you could find a recipe.
And those recipes will usually provide you with the quantities and then the types of peppers to grow.
And so, once you know the types of peppers to grow, you can find those seeds or plants and then you can proceed from there.
And I'll share some resources at the end where you can find recipes.
You can also do what Maggie and I do, and that is that you can just use your excess peppers from year to year and make hot sauce out of it.
And as long as you have a good mix of peppers, you'll get a really good hot sauce.
And ours will vary from year to year because we grow different peppers from every-- from year to year.
And so-- But that's fine.
We're certainly happy with that.
Plus, once your sauce gets hot enough, does the flavor really matter all that much?
And then, the last thing you can do is you can try to design your own sauce.
So, you can vary the hotness.
So, if you have maybe a palate that doesn't like really spicy, you could maybe use, you know, jalapeños or poblano peppers instead to get the spice level down.
Because a lot of the spicier peppers are thin-walled, you really want to add peppers that are gonna bulk up your ferment.
And so, you'll add filler peppers, and you can vary those, and that adds additional flavor.
So, you could use bell peppers.
You could use cherry bells.
You could use Italian frying peppers.
It's really what you wanna grow in terms of your flavor.
And then lastly, you can add other things to maybe make it sweeter.
You could smoke some peppers and then ferment that to give your sauce a little bit of a smoky note.
And so, really, the sky's the limit.
Just if you're gonna make your own hot sauce and you're trying to come up with that recipe, make sure you write it down so it's reproducible.
But the goal really in this process is to figure out what peppers you wanna grow.
And so, on the growing side of things, you can go in two different directions.
You could simply go to the nursery, buy pepper plants, put them in the ground, and grow those.
Again, this is your pepper journey.
And so, if that's easier for you or you don't have time to start seeds, totally fine.
But one of the problems is that you may not find the variety of pepper you're looking for at your local nursery.
And so, growing plants from seed gives you a bigger variety of what you can grow.
And so, I'm gonna be talking largely about growing your plants from seed.
And so, once you've got your seeds, the first thing you wanna do is figure out what time of the year do you plant them.
And pepper plants are started indoors from seed.
And I don't know what the right term is anymore.
I'm either an inactive or retired Wisconsin master gardener.
And one of the best things I got from the Extension program was this little two-page sheet on seed starting in Wisconsin.
And so, this is the spring sheet.
There's a sheet in the fall for succession planting.
You can see at the top, one of the first things you start are pepper plants.
And I believe it says late March to early April.
And so, there's a little bit of a window based on when your last frost date is.
We used to live in southeastern Wisconsin.
We live in southwestern Wisconsin, which is as far south as you can get without being in Illinois.
And so, we feel like we're in the area where frost is gonna be done soonest, but despite that, we plant our plants on Memorial Day weekend.
We've been burned too many times by frost the second week in May, third week in May.
So, we just hold off on putting in basil and tomatoes and peppers until Memorial Day weekend.
And usually, those plants will go all the way into October.
So, you're really not gonna miss out on anything unless you're trying to grow plants to sell at the market and you wanna try to get into the market with produce as quickly as possible.
And so, we always shoot for getting our plants in the ground on Memorial Day weekend.
And so, through that logic, you could then plant your seeds in early April.
We actually end up planting ours indoors around the third week in March.
And that gives us a little bit more flexibility.
Like, it ends up being a nicer spring, we then just put them out and we let them harden off longer, and they just get more sunlight and they'll get stronger before we end up putting 'em in the ground on Memorial Day.
And so, we end up starting them really more in late March than in early April.
And so, to get your seeds going, once you've got your seeds and you've got your date, you wanna gather your supplies.
And there's a whole list of things up here.
I'm not gonna run through it, but I'll just point out a couple things.
One is pots.
We use 72-count cell packs that'll fit in what's called, I think, a 1020 tray.
And I know I mentioned sustainability earlier, and you probably have seen articles about starting seeds in eggshells and in toilet paper rolls and making your own pots from paper.
But I feel like we have, like, one shot to get these seeds going and get into the garden.
And so, I wanna take every opportunity to make sure that my seeds germinate and start to grow.
And so, we just use cell packs, and the sustainable, the sustainable part for us is reusing them every year.
So, I collect them after we get everything in the ground.
I spend a half a day washing 'em all out, and then we dry them and they go in our garden shed.
I will say that I did go to a demonstration yesterday on soil blocking, and I was really intrigued by that.
And so, I think I'm gonna try some soil blocking, maybe starting with brassicas, but that's an option as well.
The other thing you'll need with-- in addition to the cell tray or the cell pots, you'll need the watering tray because you'll water these plants from the bottom rather than the top.
And so, that tray then holds the water that-- and your plants.
And then, the last thing you'll want is a dome, because seeds will germinate more quickly if they have a little bit more heat and a little bit humidity.
And so, you put the dome on, and once the plants start to sprout, you take the dome off.
So, you only really need it for a couple of weeks, but it is handy.
If you don't have one, it's fine, but usually you can buy these things all as a kit.
I think Jiffy sells them like all together, so you can buy them all together.
The other thing I'll mention is seed-starting mix.
So, we use a special sterilized seed-starting mix.
You don't wanna use potting soil or topsoil because it's a little heavier.
Your rootlets in your little seedlings will struggle.
And this media is sterile.
And so, it's not gonna have fungi and all those other things.
So, you're gonna give your seeds the best opportunity to start up.
The other thing that's important-- oh, labels.
So, I will say that you wanna label your plants "peppers."
Unless you've been growing them for a while, they all look the same.
So, label your plants.
And I will say, use the shorter labels rather than the tall ones because you won't be able to get your dome on.
So, the small ones are good.
If you use the tall ones, you'll end up cutting 'em in half.
And then, a heating mat is also useful too because peppers like heat.
Most plants will germinate and grow better initially with a little heat applied to them.
And so, a heat mat is very useful.
The last thing you really need that's important is light.
And so, this is our setup.
So, we have a south-facing walkout basement.
This is a nursery shelf that I found, unbelievably, at an estate sale on half day off day, with the lights.
So, it was really handy.
So, this is what we grow on, and we grow everything from seed.
We don't buy anything at a nursery.
It's either direct sowed or we grow it indoors.
And so, this setup works for us.
But you don't have to get as fancy as this.
We've grown for many years by just growing in a south-facing window.
This is a little greenhouse setup.
We don't use the actual greenhouse part itself, but this lives in our living room from March until May.
So, we throw all our plants up there, particularly when they get a little bigger.
And if you're just relying on window light, you'll wanna rotate your trays every few days 'cause the plants will start to lean.
They really do like more light, but you can get by, especially if you're only growing a flat, you can get by with window light.
On the other side of the picture, you'll see a little bit of a setup.
If you've got basement shelves that you can empty for a couple of months, you can pull everything off those shelves and set up just shop lights and then put your flat or two underneath that.
Plants will grow just fine under 48-inch fluorescent bulbs or LED bulbs.
You don't have to buy special expensive lights.
The goal is just to get these plants started, and a broad spectrum of light is really all they need.
So, you have a lot of different options you can use for light.
But that tends to be the biggest limiting factor for starting plants indoors.
And the process is really straightforward.
You just fill your pots up with seed-starting mix and you moisten it with a mister.
I will put two seeds in each cell just in case one doesn't germinate.
You cover them.
The rule of thumb is you cover the seed to the thickness of the seed itself.
So, for pepper plants, that's about 1/8 of an inch to 1/4 of an inch.
Then you moisten that with a mister.
You take your tray of seeds, you put it in the light, you fill it with water.
It's easier to fill with water after you move it rather than before you move it.
Put your dome on, plug in your heat lamp, and you're good to go.
And within seven to fourteen days, you'll get little seedlings forming.
Once they start to sprout, you'll wanna take the dome off to let them have good air circulation, and you'll want to start giving them a very weak fertilizer.
We just use watered-down Miracle-Gro, and you want to fertilize 'em about once a week, because seed-starting mix doesn't really have a lot of nutrients in it, so you wanna apply some fertilizer.
And then, you really just keep an eye on 'em, make sure you keep 'em watered, until you get to about the third week in April.
And then, you have a decision to make.
You can let your plants go and just let them grow and keep fertilizing them and increase the concentration of fertilizer.
And that works if you're using, like, 48-count cell trays because the plants will be a little farther apart.
But if you're using 72 cells, what we do is we up-pot our plants around the third week in April.
And so, we'll get three-inch pots.
And I mix up a mix of topsoil and potting soil and a little bit of perlite, and that gives some nutrients to the plants.
It also gives a little firmer soil to make the roots work a little bit.
And pot them up, put tags in 'em, and then put them back in the trays.
And then you just, again, keep an eye on 'em, keep 'em watered.
And eventually, you'll get to early May.
So, that's the point where you're getting really excited.
You know, you're getting ready to get your garden going.
And this is the point where you start to harden off your plants.
And so, that's the process of getting your little babies that you've been caring for for the past, you know, five or six weeks and you're getting them used to being outside.
And so, for us, we have a north-facing patio.
And so, we set up tables and we put our trays out on those tables starting in early May, where they're shady and protected and start hardening them off.
But you also wanna keep an eye on the weather, because as I mentioned earlier, frost can happen at any time and you wanna make sure that you're bringing your trays in the house when it looks like it's gonna get, you know, 40, 45 degrees so you don't get them killed by frost.
And so, we harden them off on the north side of the porch for about a week, week and a half, and then we move them to our walkout basement slab, which is on the south side of the house, that second week in May.
And that gives them full, direct light.
And that really helps get them going and get them used to being in full light.
And just keep 'em watered.
The other thing you wanna keep an eye out, in addition to frost, is rain.
Because if you get a lot of rain, these trays don't have drainage, and so they'll fill with water.
And so, you'll wanna dump the water out so you don't drown your plants, and then it'll also leach out nutrients, and so you wanna also keep up with some fertilization.
And then eventually, you get to the point where you're gonna wanna stick 'em in the ground.
And so, we just bring out a folding table to the garden.
And I like to lay out how I'm gonna plant things before I plant them.
This is something I learned a couple of years ago, rather than having to bend down and the pots fall over in the grass.
So, I just drag a table out 'cause we have these folding tables.
And so, I figure out where everything's gonna go and then get 'em in the ground.
And as you can see, we use landscape fabric.
We plant in woven landscape fabric in our beds.
And you just simply plant 'em like you would any other plant from the nursery.
And then, we use three-inch-- or three-foot bamboo stakes, and we stake 'em right away so that you're not trying to stake 'em when the plant gets bigger.
And if you've done any gardening at all, you're probably familiar with this scene.
The plants look a little sad at this point.
You know, you've got this giant garden, you've got these little tiny plants.
But as you know, if you keep the faith, in a month or two, they're gonna look like-- so they're gonna look like that.
So, big and bushy.
They're gonna be producing fruit.
You'll end up with baskets of fruit if you've done everything well.
Peppers are pretty hardy.
They will tolerate dry conditions.
They'll tolerate heat.
They're not a big fan of it being really cold.
But usually by the time June rolls around-- although it's Wisconsin, you never know-- it'll warm up and your pepper plant should do just fine.
We don't water ours too much, but if it gets dry for a couple of weeks, we've had some dry years, some drought years, so we will water them occasionally, but they are pretty hardy.
So, once you get to the point of putting 'em in the ground, as long as animals don't dig 'em up.
We had one year, our neighbor's cows got out and they trampled our garden.
So, if you don't have anything like that, then they should be pretty good, and you'll start to get baskets of peppers.
Which then brings us to the second part, which is making your sauce.
And so, just a few disclaimers, and that is you're making a food product, so your ultimate goal is to make something like this.
This is a 45-minute presentation, so I can't tell you all the ins and outs of food preservation.
So, this is meant as an introduction.
Do your homework.
The biggest thing I can say is, food sanitation is very important, just like it is with any other sort of cooking.
So, you wanna use produce that's not bruised, that's not damaged.
Make sure you're keeping a clean kitchen, all those sorts of things.
And the biggest thing with making hot sauce is the preservation method is really pH.
So, if you're doing water bath canning, the pH lowering is done by vinegar, and fermentation, it's done through bacterial action.
So, that's what you're trying to do is you're trying to lower the pH.
And then, the last thing I'll just say is, you know, consider the volume of sauce you're gonna use in a typical year.
You don't wanna end-- one of these jars is 5.5 ounces.
And so, for making a half-gallon jar of ferment, that'll produce about four of these because we strain off our solids.
And so, if you do the math, you can figure out, you know, how much you use in a year.
You don't wanna make, you know, 20 gallons of hot sauce if you're not gonna eat it in the course of a year.
So, just keep that in mind.
And then, like I said with the growing part, you can certainly go out and buy pepper plants.
If you, if your plants don't make it or you run out of time in the spring, you're not able to get seed started.
You could certainly take what I'm gonna tell you and just go to the farmer's market and buy peppers.
Nothing wrong with that too.
That's actually how Maggie and I really got started with homesteading.
We used to live in Wauwatosa.
We had a young son, and we would take him and his cousins to u-pick strawberry places, and we'd end up with these flats of strawberries and we had to do something with them, and so we started making strawberry jelly.
And so, going to the farmer's market and buying peppers is perfectly fine.
It gives you a chance to learn a new skill.
And so, for preserving food, particularly liquid foods, there's really three methods that you can use.
One is water bath canning.
And that is what probably everyone in the room is familiar with, where you take your Ball jar, you put on your two-piece lid, you process it in a pot of boiling water, or if you're using an atmospheric steam canner.
And then, you're relying on vinegar to be really the preservative.
And I'm not gonna really talk about water bath canning because there's a ton of resources out there.
And so, I would direct you to those.
But I will say that I did find a really good taco sauce recipe in a Better Homes and Garden canning book.
And I'll talk about that a little later.
But if you wanna do hot sauce strictly with water bath canning, that's a great starting point.
The second way that you can preserve food is through pressure canning, and that's done with pH-neutral foods.
So, green beans, chicken stock, those sorts of things.
And I'm not gonna talk about that as well because you don't need to use that for hot sauce.
So, if you're hoping that hot sauce would be an entrée to learn how to do pressure canning, you're gonna have to can something else.
Maybe go get some rotisserie chicken and make chicken stock.
So, the third way, which I am gonna talk about, is fermentation.
And this is how sriracha is made.
I think it's how Frank's hot sauce is made.
A lot of the commercial sauces are made through fermentation, and it's simply a biological process where you're using microorganisms to turn your food into other kinds of food.
And it's used for all sorts of things: making cheese, the yeast in bread, making beer, making kimchi, sauerkraut, all those sorts of things.
And it's an anaerobic process, so it's done in the absence of oxygen and it produces carbon dioxide.
And one of the other products it produces is lactic acid.
And that acid is what lowers the pH in addition to the salt brine that you're using in your ferment.
Those together are what provides the preservation part of it.
And so, to do your fermentation, you need a few tools, most of which you have around your kitchen.
But there are a couple of specialty things that I'll point out.
So, one of the things that's really helpful-- And we use canning jars because we have a gazillion canning jars.
And so, we use quart canning jars and half-gallon canning jars.
And that works fine.
As I mentioned, it'll make, you know, a few bottles of hot sauce.
And one of the specialized fermentation tools that's really handy is this pickle packer, which is this-- It's the hourglass-shaped piece of wood there.
And that helps to pack the peppers into the jar firmly.
And that's really useful because the peppers are really where the flavor are.
And so, the more peppers you can cram into a jar, the better.
And so, that packer really helps you get a lot of peppers in.
It also helps to reduce the amount of potential for air pockets, which you wanna try to avoid.
You'll also be making a brine solution, which is just a mixture of salt and water.
And that seems easy enough, but on the water side, you wanna use nonchlorinated water.
Municipalities add chlorination to water to prohibit microbial growth, and we're shooting for the opposite here.
So, you wanna use nonchlorinated water.
And you don't have to buy fancy bottled water.
You could just go buy a gallon jug of distilled water from the grocery store.
That'll work just fine.
And then, on the salt side, you wanna use a sea salt or a kosher salt.
You don't wanna use something that's iodine.
You don't wanna have anything that's got anti-caking agents in it.
So, a kosher salt is really what you wanna do.
So, that's the kind of the second specialty thing.
The third is you wanna have-- As I mentioned, this is an anaerobic process, and so you wanna keep the solids away from oxygen.
And so, one way you can do that is to keep the solids below the level of your brine liquid.
And to do that, you can use these glass weights.
I call 'em pickle pebbles.
That might be a marketable term.
That might be on the box.
And they're just little glass weights that are the size of the opening of your jar.
And so, you just fill your jar up and you put the weight on, and that helps keeps the solids below the level of the liquid.
And then the last specialty thing you need is an airlock to keep that oxygen out.
And so, they sell a lot of different varieties of these.
There's this pink one on here.
I call it a pickle nipple.
And the little nipple part's got a little slit in it, and it allows carbon dioxide to come out but doesn't let air to come in.
You could also use these other airlocks.
Because I do home brewing, I have a lot of this style airlock, and it's just a little container that you put with water and you put a cap on it, and it lets carbon dioxide bubble out and keeps oxygen from going in.
One other thing I'll mention that is important are latex gloves.
So, if you've ever cut up hot peppers and you've touched parts of your body and regretted it, don't skimp on the disposable gloves, because you will, you will regret it, especially with the hot peppers.
But by and large, you just use what you have in your kitchen.
And it's a relatively-- oh, before I get into the actual process, I'll talk about two numbers to know.
First is the brine.
The number you're shooting for for your concentration of salt in your brine is about 2% to 5%.
And usually, we go for about 3%.
So, if you're-- And we do things by weight because salts will weigh differently.
So, if you use about 30 grams-- it says 28 grams of salt per quart of water-- that will get you in the range of brine that you need for this particular project.
The other thing you wanna keep in mind numberwise is pH, and you're looking to get your pH below q 4.6.
And so, to do your ferment, the-- It's really relatively straightforward.
You just take your peppers and chop 'em up.
And I like to make them a coarse to a medium dice.
You can run 'em through your food processor, but I find that you get a lot of pulp and it's a little too fine, and you end up with a lot of solids that could potentially float to the top of your ferment.
And if you start to get solids at the top, there's a potential to start mold to grow.
And that's fine.
You can just scoop it off and throw the mold away.
But if you're new to fermenting, that might freak you out a little bit, so it's best just to probably avoid that.
And one of the ways to do it is to really minimize the solids that are floating on top of your brine.
So, I usually just dice up my peppers.
And you only really are dicing up, you know, maybe 20 peppers, so it's really not a lot of work.
And then you slowly start adding them to your jar.
And if you're uncertain about how much hot pepper to put in your hot sauce because maybe you're freestyling, you're making your own recipe up, you can use, rather than a half-gallon jar, you could use two quart jars, and then dice up all your hot peppers and put 'em in one container.
And then, maybe put a third to a quarter of them in one jar and the rest into the other jar.
And when you get to the end, you'll have two different bowls of blended ferment, and you can taste them.
And if the one is, like, unbelievably hot, you can then add some of your mild in and help to mild it up a little bit.
And if you find that they're both edible, then you just mix them both together.
But it's a way to keep things separate in case you're quite not sure how it's gonna come out.
But you just pack your peppers into the jars, and you wanna stay about two inches from the top of the jar.
This is a mistake I make all the time.
I always put too much in my jar.
The problem is that, once it starts fermenting, it starts generating these gases, and there's a potential that it could come out your airlock.
And I have this happen all the time.
So, don't do what I do, do what I say, and that is to keep your ferments, you know, probably two inches-- or your solids two inches below the top of your jar.
Then you'll fill it up to-- with your brine-- to about an inch below the top of the jar.
And then you put your pickle pebble on and get everything weighed down, then you put your airlock on.
And then, I put it on a small plate because, again, I usually over-bubble mine and it doesn't make a mess on the counter then if I put it on a plate.
And then, you keep it out of direct sunlight.
And that's really all there is to it.
And again, the nice thing about making hot sauce is you're making very small batches.
So, you're doing this in quart jars, half-gallon jars.
Very, very accessible.
Much easier than making jelly.
And so, the next question is, you know, when's it done?
And so, you can determine when it's done in two ways.
You can simply follow a recipe, and usually it'll tell you it's like one to three weeks.
Peppers don't take a lot of time to ferment.
Or you can take the pH and check that.
And that's really the best method because then you know that you're below the target pH of 4.6.
Just as a tip, you don't wanna dip the pH paper into your ferment.
You wanna take some brine out and dip it into there.
You don't wanna cross contaminate your ferment with whatever's on that pH paper.
So, dip a little bit of brine out and dip your pH paper into that.
But usually, in a-- You're probably doing this in late summer, early fall.
Our houses are probably in the upper 70s, maybe low 70s.
That's perfect for fermentation, and your ferments will be done in just a couple weeks.
And then, it's a matter of then making your sauce.
And I take-- What I'll do is I take my jar, take the pickle pebble out, and pour the brine off into a measuring cup-- most of the brine.
And then, I'll pour the rest of the solids and whatever brine is left into a blender.
And if I feel like I need to add more liquid, then I'll use a little bit of brine.
Most of the flavor's in the actual peppers rather than the brine.
And so, I'll then blend it up.
If I feel like I need a little bit more liquid, then I'll add a little bit more.
And then, at this point, you could use it as basically like a chutney at this point.
So, if that's what you're shooting for, you could stop here and bottle it, and you'll end up with a lot more than four jars.
But because I like to use the little sauce jars that looks like I actually made hot sauce, I like to strain it off.
And so, I just pass it through a fine mesh strainer, press out the solids, and then I've got liquid.
That's then time to take to the next step, which is putting up.
And you really have three options for this with fermented pepper sauce.
The first is you could simply put it into jars and throw it in your refrigerator.
And for all those people who are fermenters, probably this is what you do.
Ferments supposedly have a lot of beneficial qualities because they have beneficial microorganisms, probiotics, and so there's a lot of people that like to eat fermented foods that are actively fermenting, but the refrigeration part inhibits that process, so you can store it for longer periods of time in your refrigerator.
It'll slowly get, develop more and more taste.
The problem we have is that, as I mentioned before, my wife likes to ferment a lot.
We have a refrigerator full of jars, and so we really don't have room for yet more jars of things.
And so, I like to make it shelf-stable, which will probably freak out people that like to ferment.
But again, this is your pepper journey, so do whatever you're comfortable with.
And so, if you want to make it shelf-stable, you can then water bath can it.
So, you've dropped the pH down.
So, basically you've done the equivalent of adding vinegar.
And so, you can go ahead and use two-part lids and you can water bath can it, or you can can it in an atmospheric steam canner.
And leave about a quarter-inch of headspace.
I think you can process it for, like, 30 minutes.
And you're set.
The third option, because if you're doing something like this-- this is a red one I made-- It doesn't have two-part lids, and so you've got to go a different route for bottling it.
And so, what we do is pasteurization.
And so, that's also another common practice with water bath canning.
This is a picture from the USDA guide for pickles.
Some people will pasteurize their pickles because it will help them be a little crispier.
Rather than boiling them in boiling water, you have a reduced temperature.
And so, it's also a similar process.
Has anyone made maple syrup in here before?
Okay, so it's very similar to maple syrup, where you heat the syrup and you put it in hot jars and then you lay it on its side.
It's the same exact process.
So, you take your liquid hot sauce, you put it in a pot, and you bring it up to about 190 for 30 minutes.
And at the same time, you heat up your jars and your lids.
And we do a lot of-- Rather than water bath canning, we've switched to atmospheric steam canning.
And so, we have this setup and we just put our jars and lids in there.
We throw the lid on and we steam the jars for 30 minutes.
And when the jars are hot and when the hot sauce is hot, we then put everything together.
And you fill up your jars up to the top with hot sauce and put the lid on, and then lay it on its side for a little bit, for like a minute, and then just put it on a wire rack.
And as the sauce cools, it'll condense in volume and you'll get a little bit of a head space and a little bit of a vacuum.
Exact same process you use for maple syrup, if you've done that.
And then, finally, at the very end, you get to label it and enjoy it.
And take it from me that has a basement full of jars, label your products.
Label them with a year.
Very important.
You may think that you'll remember that you made something last year, but as time goes by and you get more and more things and you don't eat what you made previously, it's good to have a date on it especially.
And you can do-- This one is just a little label maker that we use.
We also have made little labels.
This is just a little watercolor of our barn.
These were originally-- We made these for putting on canned goods because we do a lot of Christmas presents with our canning or we'll trade it with neighbors and things like that.
And so, I think we got ours made through Evermine, but there's a number of on-site places you can go where you can get these labels made.
And it gives you a space to put, again, what's in the jar and what year it is.
And for resources on the gardening side, there's a-- I think it's called the New Seed Saver Guide.
This is a picture-- I found a couple of copies at Half Price Books.
We use the The Vegetable Gardener's Bible for just general gardening.
We've used that for many, many years.
You can also find that in used bookstores.
UW-Extension has guidance on growing peppers and tomatoes and eggplant on a larger market scale.
So, if that's a direction you want to go, you could go to UW-Extension.
On the canning side, if you've done any canning whatsoever, you know that Ball makes a book or two on canning.
Oddly enough, I've never really found a good taco sauce recipe that doesn't call for, like, using tomato paste or something I have to go to the store and buy.
But this U.S.-- or, I'm sorry, the Better Homes and Garden guide called Can It!, that's where the taco sauce recipe that I found that I like is from.
And it's things right out of your garden.
So, you don't have to buy anything other than what you're producing.
And I've, we, as I'll mention at the end, we have a blog, and I posted the recipe there.
And then, on the fermentation side, there's a whole book on making fermented sauces and chutneys called Fiery Ferments.
And so, if you're really, really interested in that, I would recommend that book.
One of the nice features of it is that it has a chapter on different types of peppers, and it'll give a profile on their degree of hotness and their flavor.
So, if you're looking for something that's fruity or a specific flavor, that's a great resource.
Sandor Katz has a ton of books out there on fermentation.
This one we bought probably 15 years ago at Fermentation Fest, but I know he's got a number of 'em out there right now.
And then, oddly enough, as I was wrapping this presentation up, at the end of last year, Hobby Farm magazine, their last issue of the year, published an article on making pepper sauce.
And so, if you have a library pass and you have Libby on your tablet, then you could go and find the back issue of this and look at that article.
It doesn't really talk much about the canning part of it, but it gives a good overview.
And again, if you have a Libby account, you can find that.
And so, that's really it.
As I mentioned, we have a website.
We don't sell anything, we don't have ads.
This is really a blog that we post so our family knows what we're up to and that we're still alive, 'cause they think it's a little odd what we do.
So, we post things on, like, rehabbing our house and our chickens.
This is my wife with our assistants.
So, we'll have articles about that.
And it's blackhammeracres.com.
I know that sounds really ominous, but it's based on a USDA soil type that's on our property.
So, it's not based on a Magic: The Gathering sort of thing.
[audience laughs] So, a pretty boring origin to the name.
But that's really it.
So, again, thank you all for coming out today and I'll open it up for questions.
- Attendee 1: What's the shelf life of the hot sauces?
- So, if you're doing like this where you're pasteurizing it or water bath canning it, it's probably about a year.
I think we've eaten things that are three years old and we've never died.
[audience laughs] So, that's the whole, like, "do your homework" sort of thing.
So, anything probably past a year, you wanna just be careful about.
It all comes down to taste, and that's something I should have pointed out, is that regardless of what you're making, taste it.
And if it tastes off, if you pull something off the shelf and the lid has popped off the jar or it's not, like, sealed anymore, throw it out.
You're better off throwing it out.
If it's got an off taste or an off flavor, throw it out.
But by and large, if everything's sealed, it'll last a long time.
Yes, ma'am.
- Attendee 2: Do you leave the seeds in or seeds out?
- Ed: Oh... We-- I will shake them out, but I'm not gonna, I don't, I'm not super diligent about getting everything out.
So, you could-- I will take the stems off.
And I will maybe take some of the... I'm trying-- the ribs out, and that'll take some of the seeds, but I don't really worry about getting all the seeds out.
So, you can ferment it with the seeds in, so.
Yes.
- Attendee 3: What are you staking the pepper plants for?
Why the stakes?
- Ed: Oh, why am I staking it?
I'm sorry, I'm supposed to repeat the question.
So, why am I staking the pepper plants?
So, as you saw from the picture, they'll get pretty big.
And if you're growing peppers that have any sort of size to them, the stems will split.
And so, if you stake them and tie them off, it's to help mitigate that.
Yes.
- Attendee 4: Do you think a jalapeño-based sauce would be about as spicy as a jalapeño?
- So, the question is, does your sauce get less or more spicy as it ferments?
And it'll keep about the same flavor.
So, what you throw in is basically what you're gonna get out.
So, it's not gonna get spicier over time, so.
Yes.
- Attendee 5: Have you ever put fruit in hot sauces?
- So, the question is, have I ever, have I ever blended fruit with hot sauces?
And you can do that, but you have to-- We've never really done that, but what I've read, and this is from that Fiery Ferment book, is that fruits ferment differently.
And so, they will generate different flavors.
And so, I think you have to be a little careful about fruit.
And that applies to, like, tomatoes as well.
So, you can-- I've, we've never done it, but you can try, but I will give you that caveat that fruit will ferment a little differently because of the sugar content.
Yes.
- Attendee 6: [speaks indistinctly] - Ed: So, the question was, when do we pinch our pepper plants, and do we remove the first fruit?
That's a really good question.
And I've read a lot of different things about people will prune their plants to reduce the foliage, to encourage fruit growth.
And I've tried that, but I've kind of done it in a lazy sort of way, so I don't really have any research on that.
We usually just let things grow.
But I usually will try to prune some leaves out.
One of the reasons why, as you saw in the picture, we rotate our pepper plants from year to year, where they're at in our garden.
And so, when we grow them in blocks like that, I feel like if they get really bushy, then pollinators have a hard time finding the flowers.
And so, that's one of the reasons why my theory is about pruning it is just to basically provide more access to the flowers.
- Attendee 7: Do you ever overwinter peppers, or?
- So, the question is, do I ever overwinter peppers?
And we don't.
We, I don't-- I think you can.
They are-- I think they'll be perennials in other parts of the world, but we don't have greenhouse space, and we don't really have a lot of space in our house.
So, we don't overwinter, so.
Yes.
- Attendee 8: What are your favorite spicy peppers?
- Ed: What are our favorite pepper varieties?
And so, we grow-- we don't grow peppers just for making hot sauce.
So, we grow 'em from a lot of other things.
And it really depends on the year.
I personally like serrano peppers because they're really versatile.
They're small.
We make a lot of stir fries in the summer because we have a lot of vegetables.
And so, I really like serranos, and they have really good flavor.
They're about the same spiciness as a jalapeño.
We grow habaneros.
We've grown cayenne peppers, but that's really about it.
So, we've never grown ghost or Scotch bonnets or anything like that.
But those are-- the habaneros, the serranos, jalapeños are the ones that we typically use for getting that capsaicin that we're looking for, so.
- Attendee 9: Do you gradually take them off of there?
- Ed: So, the question is, do I-- do we just take the dome off and leave it off?
And the answer is yes.
And so, that brings up a good point, though, because I find with the seed-starting mix, it can be hard to break that capillary action or get that capillary action to get your soil moist.
And so, otherwise, if you ever tried to water, bulk water seed-starting mix, it will bead on the top until it gets moist.
And so, but we find that once we get that soil medium moist, and we usually do it through misting to start with.
And then, once that capillary action goes, there's enough of that to draw moisture in.
And so, we just leave the dome off.
And we find that if as long as we keep about, you know, a quarter of the watering tray with water in it, that's sufficient.
But you do wanna keep an eye on it, especially initially, because when we first get our seeds going, we'll fill that tray up halfway with water.
And within a day, that water is gone.
And so, you really wanna keep on top of it the first week or two to make sure everything's good and saturated and you've got, like, this steady state of moisture, so.
Any other questions?
Great, well, thank you very much.
[audience applauds]


Support for PBS provided by:
University Place is a local public television program presented by PBS Wisconsin
University Place is made possible by the Corporation for Public Broadcasting.